Flex Pro Updates: Firmware, App & Alarms
← All Flex Pro troubleshooting
You are checking software, firmware or app updates, or looking up a software alarm code.
Disconnect power before disassembly or electrical testing. Turn off the engraving machine before removing the laser and disconnecting its cable, or removing and reinserting the TF card. Do not turn off the machine or remove the TF card during a firmware update.
¶ Studio and App Updates
What you see: Updating AtomStack Studio and the Mobile App
1) Updating AtomStack Studio
Open the software and click Settings in the upper-left corner to enter the settings interface. At the bottom of the interface, you can view the current version number and the Check for Updates button, as shown in Figure 127.
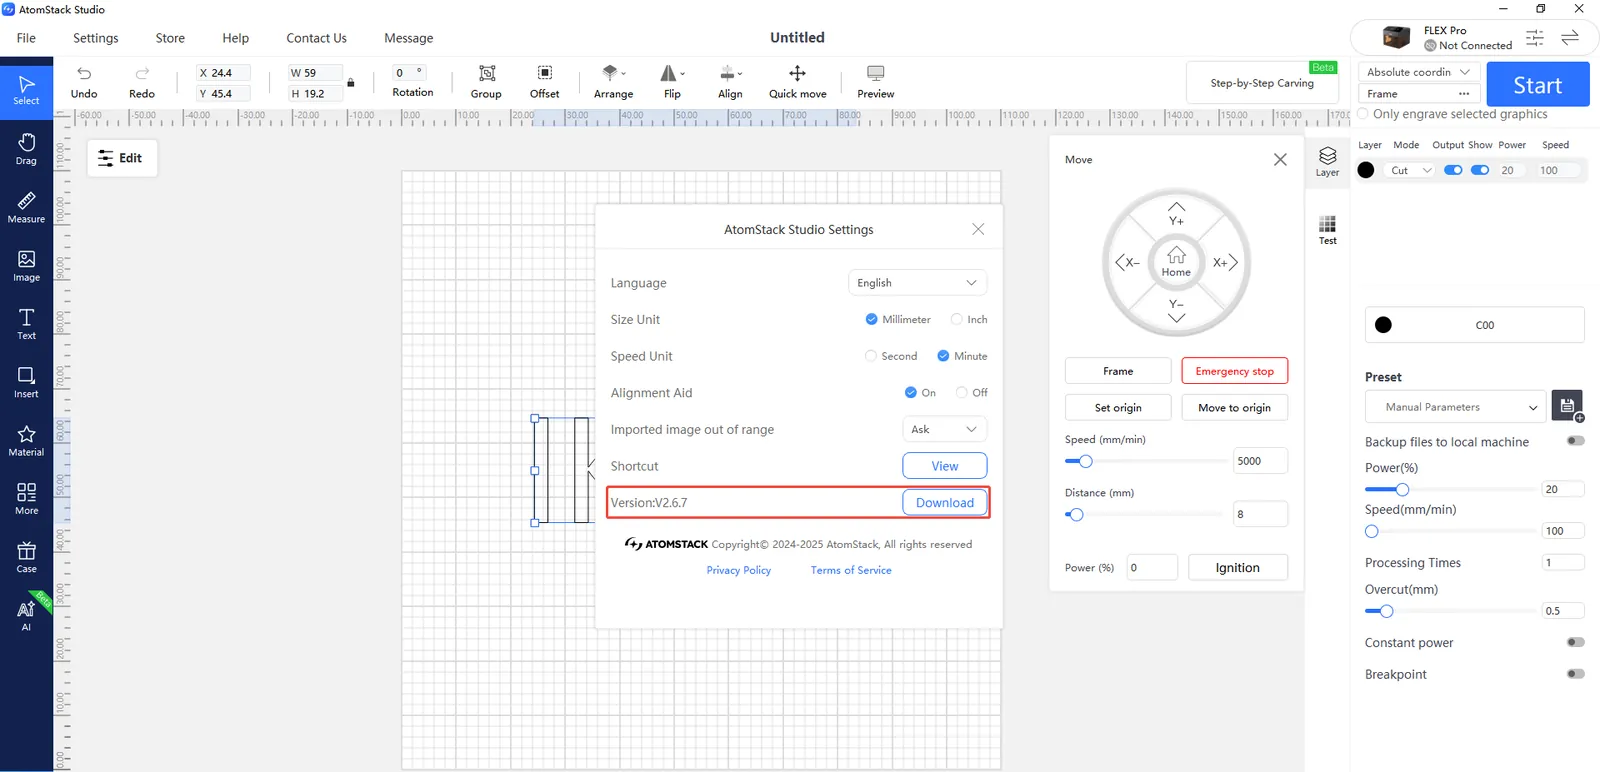
Figure 127
2) Updating the AtomStack App
Open the mobile app and tap Profile → Settings → About ATOMSTACK in the lower-right corner of the home screen to view the current app version.
If an update is available, an update option will appear on the screen. If no update is available, the message "You are using the latest version" will be displayed, as shown in Figure 128.
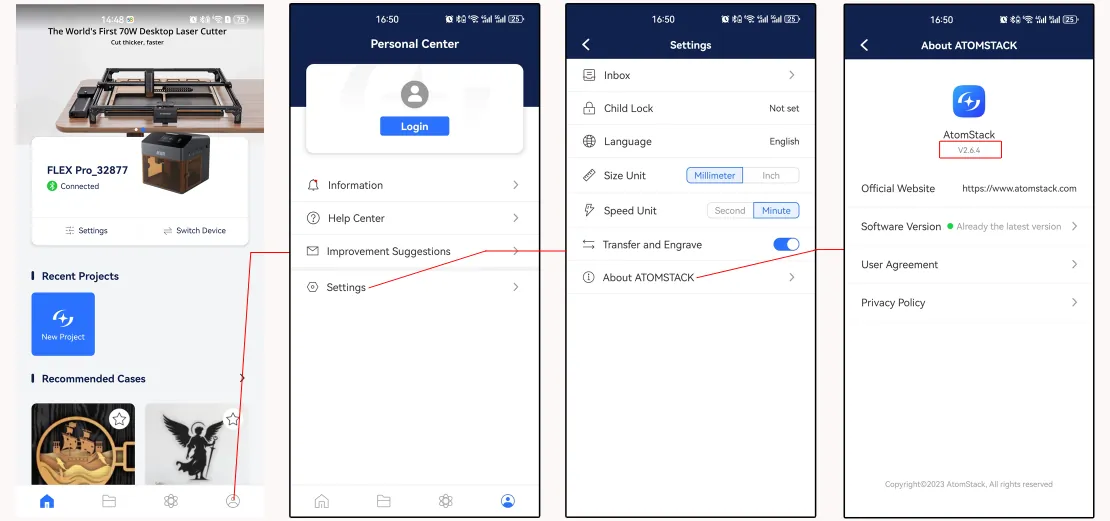
Figure 128
¶ Engraver Firmware Update
What you see: Updating the Engraver Firmware
Refer to the Flex Pro firmware update tutorial video and follow the steps below.
Note
Important: All firmware update methods require a TF card to be inserted as the storage medium. Do not disconnect the power or remove the TF card during the update process.
1) Updating Firmware via AtomStack Studio
Open the software and connect the engraver. Click the three-line menu icon in the upper-right corner of the software interface to open the device information page. The current firmware version is displayed at the bottom of the page. If an update notification appears next to the version number, click it to start the update, as shown in Figure 129.
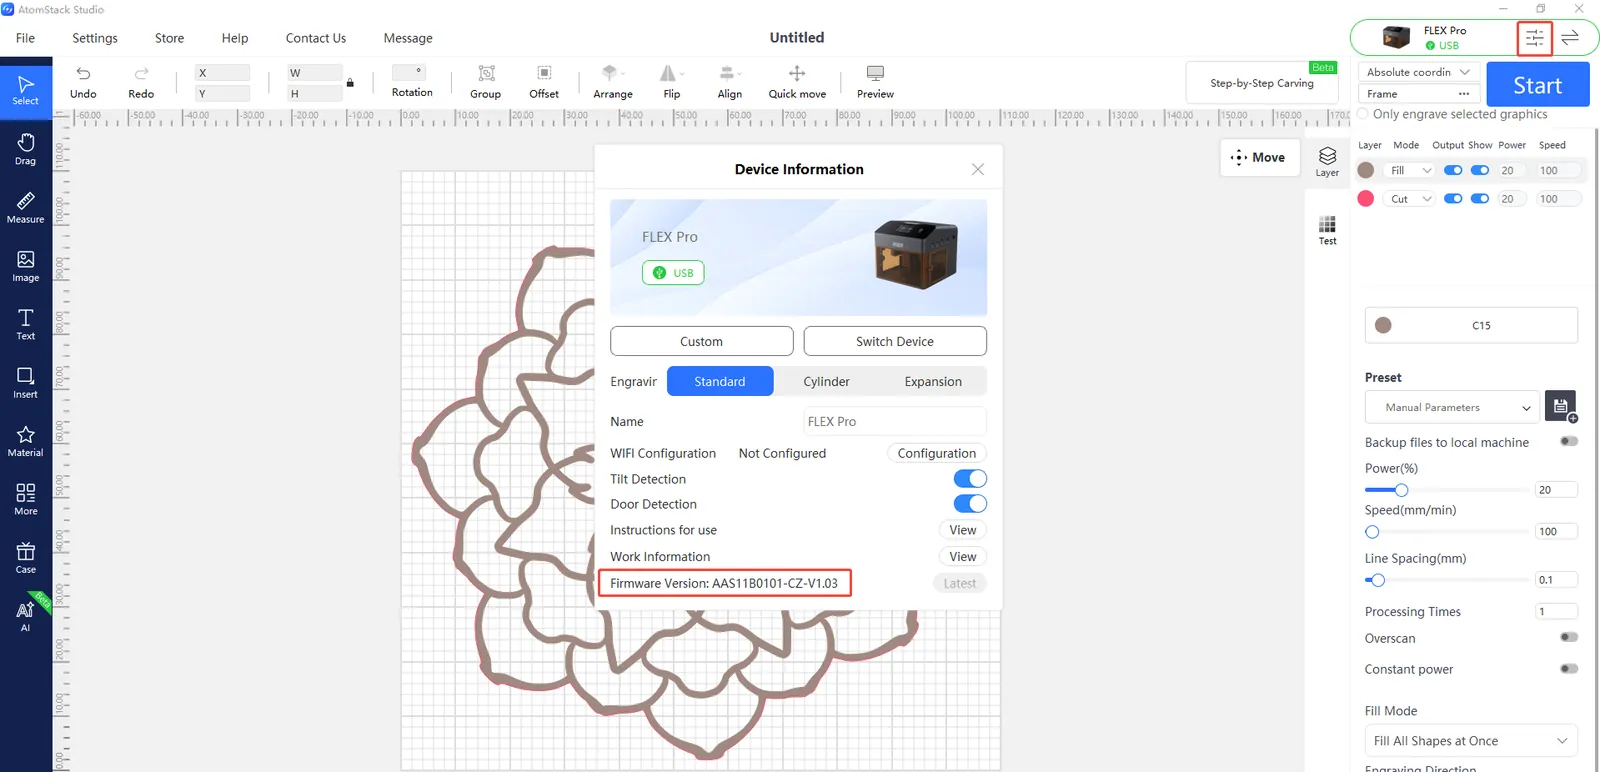
Figure 129
2) Updating Firmware via the AtomStack App
Open the app and connect the engraver. Tap Settings below the model name to open the device settings page. The current firmware version and the option to update to the latest firmware are displayed at the bottom of the page, as shown in Figure 130.
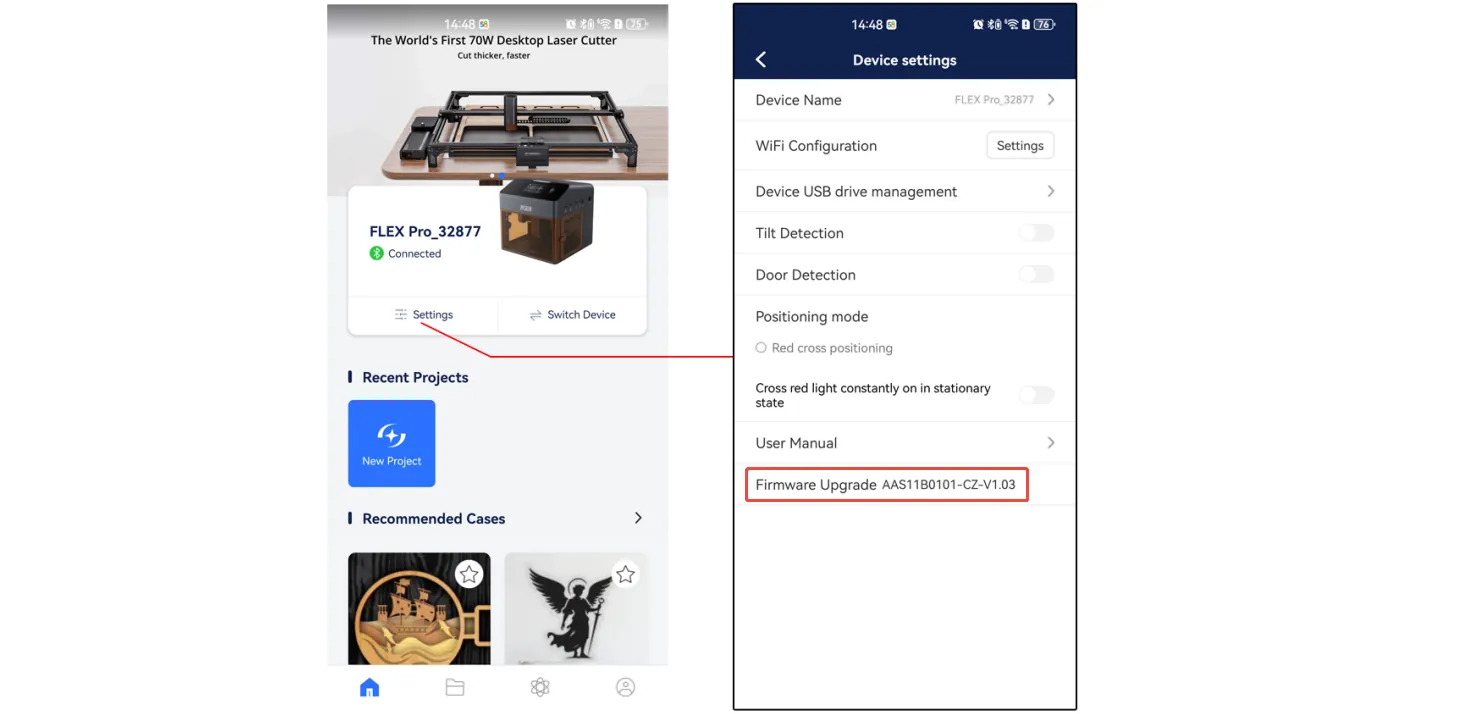
Figure 130
3) Updating Firmware Using a USB Drive
If neither of the above methods works, send Customer Support a screenshot of the engraver's current firmware version and a photo of the engraver's Serial Number label, as shown in Figure 131, to obtain the new firmware. Then follow the steps below to update the firmware.
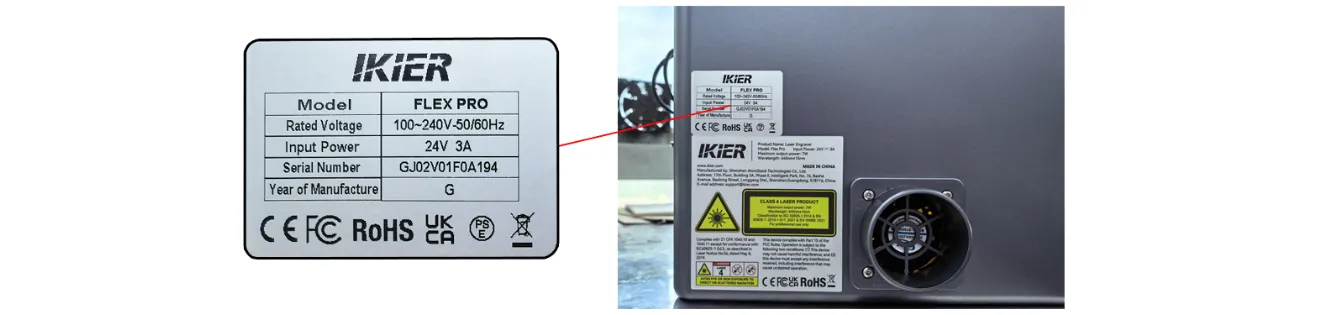
Figure 131
① Remove the USB drive and insert it into a card reader connected to a computer.
② Copy the new firmware file (in .bin format) to the root directory of the USB drive. Do not place it inside a folder.
③ Reinsert the USB drive into the engraver and power on the machine. The device will automatically start updating and emit a series of beeps.
④ Wait until the beeping stops, then restart the engraver to complete the update.
¶ Software Alarms
What you see: Software Alarm Messages and Troubleshooting
| Alarm Code | Alarm Description | Solution |
|---|---|---|
| Alarm 1 | Hard Limit Triggered | A machine limit switch has been triggered. Check whether the laser module has come into contact with a limit switch. |
| Alarm 2 | Soft Limit Triggered | The $20 parameter under Machine Settings in the software controls soft limits. If soft limits are enabled, disable them. |
| Alarm 3 | Cycle Aborted | The machine has stopped after receiving a stop command. |
| Alarm 8 | Homing Failed | This is usually caused by a limit switch failing to rebound. Check the limit switch itself. |
| Alarm 9 | Homing Failed | The homing process has failed, possibly because the machine cannot move or a limit switch fails to trigger. Troubleshoot according to the specific symptoms. |
| Alarm 11 | Tilt Alarm | The engraver is detected as tilted. If the machine is actually level, open the top cover and tighten the mounting screw in the middle of the mainboard. |
| Alarm 13 | Door Open Alarm | The enclosure door is detected as open. If the door is fully closed, refer to Section 26 for troubleshooting the door alarm. |
| Alarm 14 | Safety Lock Alarm | The USB Key is not inserted. Check whether it is properly inserted. If it is already inserted, try replacing it with another USB Key. |
| Alarm 23 | Top Cover Open Alarm | The enclosure top cover is open. Close it properly. |